Difference between revisions of "Shinmai Maou no Keiyakusha:Volume 2 Illustrations"
Jump to navigation
Jump to search
(Created page with "These are novel illustrations that were included in "Shinmai Maou no Keiyakusha Volume 2". <gallery> Image:Shinmai_v02_000.jpg|'''Cover''' Image:Shinmai_v02_000_color_01.jpg|...") |
PassifloraC (talk | contribs) m |
||
| (2 intermediate revisions by 2 users not shown) | |||
| Line 1: | Line 1: | ||
| − | These are novel illustrations that were included in |
+ | These are the novel illustrations that were included in volume 2 |
<gallery> |
<gallery> |
||
| Line 11: | Line 11: | ||
Image:Shinmai_v02_000_color_07.jpg |
Image:Shinmai_v02_000_color_07.jpg |
||
| + | |||
| − | Image:Shinmai_v02_001.jpg|'''Page 001'''<br> |
||
| − | Image:Shinmai_v02_003.jpg|'''Table of Contents''' |
||
| − | Image:Shinmai_v02_025.jpg|'''Page 025'''<br> |
||
| − | Image:Shinmai_v02_049.jpg|'''Page 049'''<br> |
||
| − | Image:Shinmai_v02_079.jpg|'''Page 079'''<br> |
||
| − | Image:Shinmai_v02_107.jpg|'''Page 107'''<br> |
||
| − | Image:Shinmai_v02_127.jpg|'''Page 127'''<br> |
||
| − | Image:Shinmai_v02_177.jpg|'''Page 177'''<br> |
||
| − | Image:Shinmai_v02_229.jpg|'''Page 229'''<br> |
||
| − | Image:Shinmai_v02_269.jpg|'''Page 269'''<br> |
||
| − | Image:Shinmai_v02_300-301.jpg|'''Page 300-301'''<br> |
||
| − | Image:Shinmai_v02_302.jpg|'''Page 302'''<br> |
||
</gallery> |
</gallery> |
||
| Line 28: | Line 17: | ||
{| border="1" cellpadding="5" cellspacing="0" style="margin: 1em 1em 1em 0; background: #f9f9f9; border: 1px #aaaaaa solid; padding: 0.2em; border-collapse: collapse;" |
{| border="1" cellpadding="5" cellspacing="0" style="margin: 1em 1em 1em 0; background: #f9f9f9; border: 1px #aaaaaa solid; padding: 0.2em; border-collapse: collapse;" |
||
|- |
|- |
||
| + | | Back to [[Shinmai Maou no Keiyakusha:Volume 1 Epilogue|Volume 1 Epilogue]] |
||
| Return to [[Shinmai Maou no Keiyakusha|Main Page]] |
| Return to [[Shinmai Maou no Keiyakusha|Main Page]] |
||
| + | | Forward to [[Shinmai Maou no Keiyakusha:Volume 2 Prologue|Prologue]] |
||
|- |
|- |
||
|} |
|} |
||
Latest revision as of 13:48, 11 November 2024
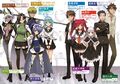
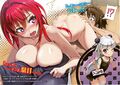
These are the novel illustrations that were included in volume 2

Cover

Front Cover
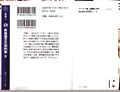
Back Cover


| Back to Volume 1 Epilogue | Return to Main Page | Forward to Prologue |