Magazine Ninedo Illustrations: Difference between revisions
Jump to navigation
Jump to search
Created page with "==Novel Illustrations== These are the novel illustrations that were included in volume 9. <gallery> File:ninendo_cover_c1.jpg|'''Chapter 1 Cover''' File:ninendo_cover_c2.jpg..." |
|||
| (7 intermediate revisions by 4 users not shown) | |||
| Line 1: | Line 1: | ||
==Novel Illustrations== | ==Novel Illustrations== | ||
These are the novel illustrations that were included in | These are the novel illustrations that were included in the magazines. | ||
<gallery> | <gallery> | ||
File:ninendo_cover_c1.jpg|'''Chapter 1 Cover''' | File:ninendo_cover_c1.jpg|'''Chapter 1 Cover''' | ||
File:ninendo c1i2.jpg|'''Chapter 1 image 1''' | |||
File:ninendo c1i1.jpg|'''Chapter 1 image 2''' | |||
File:ninendo_cover_c2.jpg|'''Chapter 2 Cover''' | File:ninendo_cover_c2.jpg|'''Chapter 2 Cover''' | ||
File:ninendo c2i1.jpg|'''Chapter 2 image 1''' | |||
File:ninendo c2i2.jpg|'''Chapter 2 image 2''' | |||
File:ninendo_cover_c3.jpg|'''Chapter 3 Cover''' | File:ninendo_cover_c3.jpg|'''Chapter 3 Cover''' | ||
File:ninendo c3i1.jpg|'''Chapter 3 image 1''' | |||
File:ninendo c3i2.jpg|'''Chapter 3 image 2''' | |||
File:ninendo_cover_c4.jpg|'''Chapter 4 Cover''' | File:ninendo_cover_c4.jpg|'''Chapter 4 Cover''' | ||
File:ninendo c4i1.jpg|'''Chapter 4 image 1''' | |||
File:ninendo c4i2.jpg|'''Chapter 4 image 2''' | |||
File:Ninendo cover c5.jpg|'''Chapter 5 Cover''' | |||
File:Ninendo c5i1.jpg|'''Chapter 5 image 1''' | |||
File:Ninendo cover c6.jpg|'''Chapter 6 Cover''' | |||
File:Ninendo c6i1.jpg|'''Chapter 6 image 1''' | |||
</gallery> | </gallery> | ||
| Line 15: | Line 27: | ||
|- | |- | ||
| Return to [[Mahouka Koukou no Rettousei|Main Page]] | | Return to [[Mahouka Koukou no Rettousei|Main Page]] | ||
|- | |- | ||
|} | |} | ||
</noinclude> | </noinclude> | ||
Latest revision as of 15:59, 5 May 2014
Novel Illustrations[edit]
These are the novel illustrations that were included in the magazines.
-
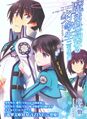 Chapter 1 Cover
 -
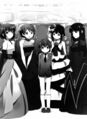 Chapter 1 image 1
 -
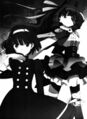 Chapter 1 image 2
 -
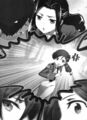
 Chapter 2 Cover
 -
 Chapter 2 image 1
 -
 Chapter 2 image 2
 -
 Chapter 3 Cover
 -
 Chapter 3 image 1
 -
 Chapter 3 image 2
 -
 Chapter 4 Cover
 -
 Chapter 4 image 1
 -
 Chapter 4 image 2
 -
 Chapter 5 Cover
 -
 Chapter 5 image 1
 -
 Chapter 6 Cover
 -
 Chapter 6 image 1


| Return to Main Page |