Horizon:Volume 3A Illustrations: Difference between revisions
Jump to navigation
Jump to search
No edit summary |
No edit summary |
||
| Line 7: | Line 7: | ||
Image:Horizon3A_0002-0003.jpg|'''Characters''' | Image:Horizon3A_0002-0003.jpg|'''Characters''' | ||
Image:Horizon3A_0004-0005.jpg|'''Hojo Ushinao and Satomi Yoshiyasu''' | Image:Horizon3A_0004-0005.jpg|'''Hojo Ushinao and Satomi Yoshiyasu''' | ||
Image:Horizon3A_0006-0007.jpg|'''World'' | Image:Horizon3A_0006-0007.jpg|'''World''' | ||
Image:Horizon3A_0008.jpg|'''Musashi Internal Divine Contact''' | Image:Horizon3A_0008.jpg|'''Musashi Internal Divine Contact''' | ||
Image:Horizon3A_0009.jpg|'''Table of Content''' | Image:Horizon3A_0009.jpg|'''Table of Content''' | ||
Revision as of 15:36, 16 September 2014
-
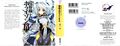
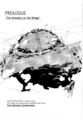
Front Cover
-
 Front and Back Cover
 -
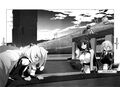
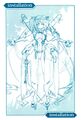 Installation Mitotsudaira Nate
 -
 Installation Mitotsudaira Nate 2
 -
 -Are you there?
 -
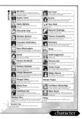
 Characters
 -
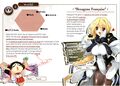
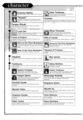
 Hojo Ushinao and Satomi Yoshiyasu
 -
 World
World -
 Musashi Internal Divine Contact
 -
 Table of Content
 -
 Introduction 1
 -
 Introduction 2
 -
 Character Introduction 1
 -
 Character Introduction 2
 -
 Glossary 1
 -
 Glossary 2
 -
 Page 017
 -
 Page 024-025
 -
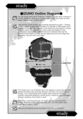 Study 1 - IZUMO Overview Diagram
 -
 Page 037
 -
 Page 051
 -
 Study 2 - IZUMO's Companies
 -
 Page 077
 -
 Page 103
 -
 Page 125
 -
 Page 131
 -
 Page 137
 -
 Page 157
 -
 Page 165
 -
 Page 189
 -
 Page 206-207
 -
 Page 215
 -
 Page 233
 -
 Study 3 - Harashi and Heishi 1
 -
 Page 237
 -
 Study 4 - Harashi and Heishi 2
 -
 Page 251
 -
 Page 277
 -
 Page 305
 -
 Page 323
 -
 Page 349
 -
 Page 371
 -
 Page 405
 -
 Page 435
 -
 Page 461
 -
 Page 489
 -
 Page 503
 -
 Study 5 - Battlefield Initial Situation Diagram
 -
 Page 509
 -
 Study 6 - Battlefield Development Diagram
 -
 Page 539
 -
 Page 573
 -
 Page 577
 -
 Page 595
 -
 Page 617
 -
 Page 641
 -
 Page 653
 -
 Page 663
 -
 Page 713
 -
 Page 735


| Return to Main Page | Forward to Preface |